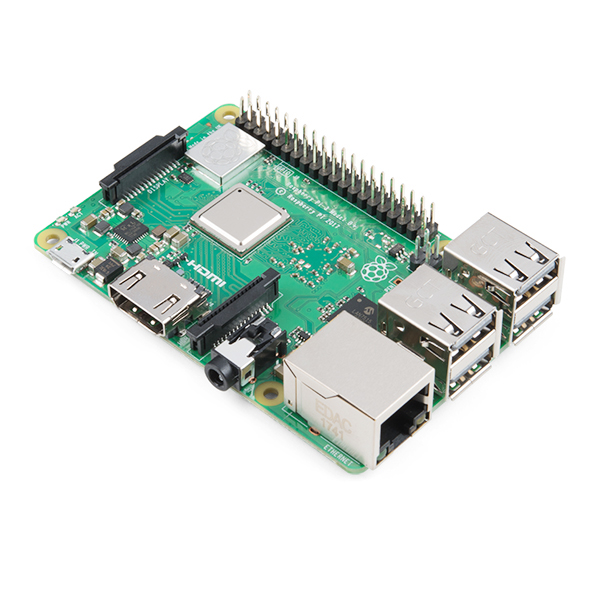
Saleculator works well on low spec boards. If you want to setup a low cost POS system, Saleculator on Raspberry Pi would be the best choice. This article will teach you how to install Saleculator POS software on Raspberry Pi.

Hardware Requirements #
- Raspberry Pi 3 or Pi 4
- 16GB SD Card
- DS3231 Real Time Clock with Battery
- 5V/3A Power Adapter
- Raspberry Pi Case
- Touchscreen or normal monitor
- HDMI to VGA Adapter, if your monitor doesn’t have HDMI
- Keyboard and Mouse
- Card reader
- Windows Laptop or PC
Software requirements #
Win32DiskImager: Software for writing Saleculator image to SD card. You can download it from the below link:
https://sourceforge.net/projects/win32diskimager/
Putty: Software for remote accessing the Raspberry Pi. You can download it from the below link:
https://www.chiark.greenend.org.uk/~sgtatham/putty/latest.html
Have these softwares installed and ready on your windows system.
Procedure #
1. Copy Saleculator image to the SD Card #
Using card reader plug the SD card into your windows computer. Now download Saleculator Image from below link
For Raspberry Pi 3 Model B:
https://www.saleculator.com/download/SaleculatorM5-2018-3-16GB.zip
For Raspberry Pi 3 Model B+ and Pi 4: https://www.saleculator.com/download/SaleculatorM5-2018-3BPlus-16GB.zip
After downloading the image file, unzip and copy it to the 16GB SD card using the Win32DiskImager.
Double click the Win32DiskImager to load it and you will get a window like the one shown below.

Click on the folder icon and load the image file. Once you plug in the 16GB SD card to your system it will show under the Device dropdown. Click “Write” button and it will start the copy process. This will take a while to complete. Once done copying click the “Exit” button. Remove the card reader and the SD card from it.
2. Connect the Raspberry Pi #
Connect the monitor with HDMI port, Keyboard and Mouse with the USB ports, Ethernet cable with Ethernet port and the power line to the power port. Insert the 16GB SD card into the Micro SD card slot.
Turn on the Raspberry Pi device. You will see Saleculator boot loader screen and then the activation screen.
You can get a 30 days trial key from below URL to activate Saleculator:
https://api.saleculator.com/trial
3. Update Date and Time #
You can update the date and time directly on the Raspberry PI or remotely using Putty. To access remotely using Putty, please refer the below document:
https://docs.saleculator.com/documentation/using-putty-to-access-saleculator-command-shell-remotely/
To access Saleculator command root directly from the machine press Ctrl + Alt + F1 on the keyboard connected to the Raspberry Pi. Once inside the command shell, login using the user name “root” and password “saleculator”
To update the date and time, type below command and hit enter key
raspi-config

Choose option 4 and enter

Choose option 12 to change the time zone

Choose the geographical area

Choose your location

Hit enter to choose the location and hit the tab key to select “Finish” and hit enter again.
Type “clear” and hit enter.
Type “Date” and hit enter and cross-check if the time matches your zone and is correct.
4. Installing “Latest Saleculator.jar” file From the root #
(To access the root press Ctrl+Alt+F1 keys on your keyboard! Enter the user name as root and password as saleculator)
To delete the existing old jar file and replace it with the new jar file:
Type:
1. cd /opt/Saleculator
(Enter, To access Saleculator folder)
2. ls
(Enter, To check the available files under Saleculator folder)
3. rm -r *
(Enter, To remove all the files available in Saleculator folder)
Download latest jar file:
Type: wget www.saleculator.com/download/test/saleculator.zip (Enter)
Unzip and delete the zip file leaving the new .jar file and lib
Type:
1. unzip saleculator.zip
(Enter)
2. rm saleculator.zip
(Enter)
3. cd
(Enter)
4. reboot
(Enter)
Activating Saleculator #
For activating Saleculator, please refer to below document:
https://docs.saleculator.com/documentation/activate-saleculator/
Updating Saleculator to the latest version #
For updating Saleculator to the latest version, please refer to below document:
https://docs.saleculator.com/documentation/updating-saleculator/


Leave a Reply